As an Amazon Associate, we earn from qualifying purchases. Some links on this site are affiliate links at no extra cost to you. Our recommendations are based on thorough research and editorial judgment.

How to Reduce Micro-Jitters When Walking With a Camcorder
To effectively reduce micro-jitters when walking with a camcorder, we should use shoulder rigs and gimbals, which stabilize our shots by evenly distributing weight and eliminating shakes. Walking with a slow, deliberate heel-to-toe motion also helps, while engaging our core and keeping elbows tucked can enhance stability. Additionally, adjusting our shutter speed can minimize motion blur. By combining these techniques and tools, we can capture more refined and professional footage—let’s explore more ways to achieve this.
Key Takeaways
- Use a shoulder rig to add weight and provide stable three-point contact during movement.
- Walk slowly with a smooth heel-to-toe motion to minimizes jolts while filming.
- Keep your grip relaxed and engage core muscles to maintain a steady hold.
- Spread your feet apart slightly and bend your knees for improved stability.
- Adjust your camera’s shutter speed to reduce motion blur in your footage.
Techniques to Minimize Micro-Jitters While Filming

Hey there! So, if you’re looking to minimize those pesky micro-jitters while filming with a camcorder, I’ve got some handy tips for you. First off, using a shoulder rig can be a game-changer. It adds some weight and creates a stable three-point contact, which really helps keep your shots steady, especially when you’re moving around.
Now, here’s a pro tip: keep your grip on the camcorder nice and relaxed. This allows it to move naturally with your body, almost like it’s an extension of yourself. Try to walk slowly with a smooth heel-to-toe motion—this technique can drastically reduce jolts in the footage. Also, remember to engage your core and keep your elbows tucked in; it feels a bit awkward at first, but it definitely helps in stabilizing the camera.
Don’t forget about shutter speed either! Setting it correctly can help you capture sharp images, reducing that annoying motion blur when shooting handheld. So, next time you’re out filming, just keep these tips in mind, and you’ll notice a big difference in the smoothness of your footage. Speaking of filming, let’s chat about lighting and its impact on your video quality! Using a carbon fibre gimbal like the Manfrotto Fast Gimboom Carbon Fibre can further enhance your camera stability and reduce fatigue during long shoots.
Choosing the Right Stabilization Tools for Your Camcorder

If you want to capture smooth footage while filming with your camcorder, picking the right stabilization tools is key. Shoulder rigs are fantastic because they help spread out the weight of the camera evenly. This means you can shoot for longer without feeling worn out. Plus, they provide a solid point of contact that helps your shots look more stable when you’re moving around. Imagine walking through a park and not having your footage look like it was filmed on a bumpy rollercoaster – that’s the magic of a shoulder rig!
Then we have stabilization gimbals, which are super handy for knocking out those tiny shakes and jitters. Think of it this way: if you’re out at a bustling event, a gimbal helps keep your shots steady, so they look clean and professional. When you throw in a camera cage with built-in stabilization, you get better balance, plus the flexibility to attach things like microphones or extra lights. And don’t forget about using lenses with optical image stabilization – these can really reduce vibrations and give you that polished look.
Using these tools together can significantly enhance your filming. Whether you’re walking through a crowded street or following a moving subject, a solid setup can make your videos shine. So, as you gear up for your next shoot, think about how each of these stabilization options can fit into your filming style! For even greater precision, consider a gimbal with 3-axis stabilization, which helps eliminate movement across multiple directions for ultra-smooth footage.
How Proper Grip Reduces Micro-Jitters
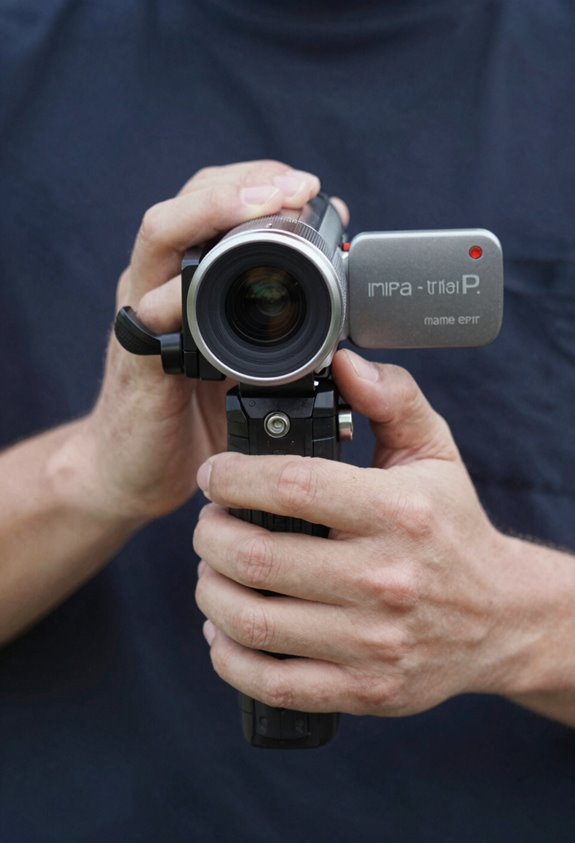
Hey there! If you’re ever filming with a camcorder and want to keep those pesky micro-jitters at bay, a proper grip is your best friend. When you grip the camcorder correctly, you can really anchor it against your body, which means it stays more stable as you move around.
One great technique to try is the three-point contact method. You hold the camcorder with both hands and press it against your face or shoulder. This way, your body acts almost like a third hand, giving you extra support. You know how sometimes you get shaky hands? Using larger grips or padded handles can really help with that by making it easier to hold the camera steady without those little wiggles.
Another quick tip is to consider shoulder support or a rig. These tools can help spread the weight out, making it easier to keep your shots steady. For setups requiring additional stability, choosing a tripod with fluid damped video heads can greatly reduce micro-jitters during movement. So next time you’re out filming, remember these simple strategies to grab hold of your camcorder better and capture smoother shots. Ready to explore more filming tips? Let’s go!
Why Do Micro-Jitters Happen and How Can You Fix Them?
Micro-jitters can be a real pain when you’re trying to capture smooth footage, right? They often pop up when there’s any sudden movement or if you’re moving over bumpy surfaces. To tackle these little annoyances, one of the best things you can do is invest in some stabilizing gear, like a gimbal or a shoulder rig. These tools give you extra points of contact, making your movements much steadier.
Another handy tip is to crank up your shutter speed. A faster shutter helps reduce motion blur, which can make your video feel more stable. For instance, if you’re filming a person walking, using a shutter speed of 1/500th of a second can really help clear up any jitters you might see.
Besides gear, your shooting technique matters too. Try spreading your feet apart a bit and bending your knees slightly while filming. Move smoothly and deliberately instead of jerking the camera around. This simple adjustment can work wonders! So, by mixing these strategies together, you’ll notice a big improvement in your video quality and get that polished look you want. Now, let’s talk about some other factors that can influence your footage! Using a 3-axis gimbal stabilizer can significantly enhance smoothness by counteracting unwanted camera movements in multiple directions.
Post-Processing Tips for Reducing Jitter
You know, while post-processing can’t completely wipe out those pesky micro-jitters, it can definitely make your footage a lot smoother and give it that polished look. One of the best tools to achieve this is Adobe’s Warp Stabilizer. It looks at your video closely and applies smart corrections to reduce any unwanted bumps or shakes.
If you’re looking for alternatives, Smoothcam or Magic Bullet can also help, and they might work better depending on how severe the jitter is. For instance, if you notice a shaky section in your clip, you can use keyframes to pinch in stabilization exactly where it’s needed, which allows you to target just those shaky bits without affecting the rest. Just be careful not to overdo it because too much stabilization can crop your video too tightly, which could mess with the quality.
And here’s a handy tip: always test your footage in different editing setups. Sometimes things will play back smoothly in one place but look pretty different once you’ve exported the clip. It’s always good to keep an eye on those final results!
For the best results when shooting, consider using cameras with advanced stabilization technology to minimize micro-jitters from the start.
Practical Solutions: Combining Gear and Techniques for Best Results
If you’re looking to capture smooth, professional-looking footage while walking with your camcorder, I’ve got some solid tips that can help reduce those annoying jitters. First off, using a shoulder rig or camera cage can really boost your stability. Think of it as giving yourself extra hands – it provides those crucial contact points that keep the camera steady.
When you’re holding the camera, aim for three contact points: use both hands and press it gently against your face. This simple technique can significantly improve steadiness. Plus, don’t rush; walking slowly and deliberately really helps cushion any bumps you encounter. For that extra polish, consider setting a higher shutter speed to minimize motion blur, which will make any minor jitters much less noticeable.
If you want to take it a step further, try adding some weight to your rig. This could be a tripod plate or an extra battery, as a heavier setup lowers the center of gravity and enhances stability. Additionally, using a professional-grade audio device like the Sennheiser MKE 600 ensures your sound quality matches the smoothness of your video. So, the next time you’re out filming, give these tricks a shot to see how much smoother your footage can be. Now, let’s explore how to make edits that really bring your footage to life.
Frequently Asked Questions
How to Stabilize a Camera While Walking?
To stabilize a camera while walking, we should explore camera rigging techniques and invest in handheld stabilizers. This combo helps us achieve smoother footage, ensuring our movement doesn’t disrupt the quality of our shots.
How to Avoid Jittery Video?
To avoid jittery video, we can’t just rely on shaky hands. By optimizing camera settings and mastering video framing techniques, we’ll create smoother shots, making our footage look professional and visually enchanting every time.
How to Get Rid of Shakiness in Video?
To get rid of shakiness in video, we should explore tripod options for stability and use effective handheld techniques. By combining these methods, we can achieve smoother, more professional-looking footage that truly captures our vision.
How to Stop Shaking When Taking a Video?
We might think stopping shaking during video requires magic, but it’s all about solid video stabilization techniques and mastering camera grip essentials. Let’s use a stabilizer and practice our stance for smoother footage.


