As an Amazon Associate, we earn from qualifying purchases. Some links on this site are affiliate links at no extra cost to you. Our recommendations are based on thorough research and editorial judgment.

Dynamic Range for Video: How to Recognize It in Real Footage
When evaluating dynamic range in video, we look for the detail captured in both shadows and highlights. A balanced histogram, without spikes, suggests good dynamic range, while clipped highlights and murky shadows indicate problems. We should also consider the lighting conditions; proper management reveals textures and prevents detail loss. Using log profiles enhances dynamic range, preserving more information in post-processing. Exploring these aspects will help us better understand the nuances of dynamic range in video footage.
Key Takeaways
- Assess tonal values in footage to ensure details are visible in both shadows and highlights.
- Utilize a balanced histogram to identify a wide dynamic range without spikes indicating clipping.
- Check for reflective surfaces maintaining texture and highlights without appearing washed out.
- Look for signs of banding or flat midtones, which indicate a lack of dynamic range.
- Employ HDR techniques and proper lighting to capture a richer dynamic range in various scenes.
Understanding Dynamic Range Basics
Dynamic range is super important in video production—it’s all about the range between the softest and brightest light that a camera can capture. Think of it like the difference between a sunset that has all its vibrant colors and the deep shadows on the ground; a camera with a good dynamic range can show details in both those areas. Basically, the more stops a camera has, the better it is at capturing details in the dark and light parts of the scene.
But here’s the thing: just because a camera lists impressive specifications doesn’t mean it’s perfect. Noise, for instance, can really mess with what we call usable dynamic range. You know when you take a picture and the bright parts look all washed out? That’s clipping, caused by overexposure, and it means you’ve lost all those beautiful details in the highlights. So when you’re looking at dynamic range, it’s not just about the numbers; you need to consider real-life conditions, like how a camera performs in different lighting scenarios.
For example, if you’re filming a wedding at sunset, you’ll want a camera that can handle both the bright sky and the often darker reception area without losing detail in either. Making sense of all this can help you make smarter choices, especially when you’re out there in the field. Speaking of choices, let’s dig into how different shooting modes can affect dynamic range! Additionally, choosing a camcorder with a larger sensor size can significantly improve your ability to capture wide dynamic range in challenging lighting.
How to Identify High Dynamic Range in Real Scenarios?

Hey there! Let’s talk about how to spot high dynamic range (HDR) in the world around us—it’s a pretty cool concept that can really amp up your photography game. When you’re out and about, keep an eye out for scenes that have a wide range of tonal values. This means you should see details in both the shadows and highlights, like a sunset where you can see the vibrant colors of the sky without losing the dark silhouettes of trees in front.
Now, one good way to check for HDR potential is by looking at a histogram on your camera. Ideally, it should show a balanced spread of data without those big spikes that hint at clipped highlights or lost details in the shadows. For instance, imagine you’re taking a photo of a mountain range at sunrise—the gradual transition from the bright sky to the darker mountain sides showcases that lovely dynamic range.
Also, when you’re photographing reflective surfaces, like water or glass, watch out for them looking washed out. You want to catch those nuances without losing any sparkle or texture. And don’t forget about the shadow areas; a great HDR shot will keep them rich and detailed instead of flat. It’s all about capturing the depth where you can still see the details, rather than that dull, milky look that hints at limited dynamic range.
Once you get the hang of this, you’ll find it easier to spot other scenarios where HDR can shine, paving the way for some stunning shots! Using a camera with a high-quality sensor can make it easier to capture and recognize these dynamic range details effectively.
Recommended Products
POWERFUL FLEXMITTER SONDE: Equipped with a high-performance Flexmitter sonde, this camera reel offers excellent range and maneuverability while maintaining the camera’s ability to navigate turns

POWERFUL FLEXMITTER SONDE: Equipped with a high-performance Flexmitter sonde, this camera reel offers excellent range and maneuverability while maintaining the camera’s ability to navigate turns

POWERFUL FLEXMITTER SONDE: Equipped with a high-performance Flexmitter sonde, this camera reel offers excellent range and maneuverability while maintaining the camera’s ability to navigate turns
Key Indicators of Low Dynamic Range in Video

Hey, have you ever thought about low dynamic range in video while shooting? It can really impact how your story comes across. For instance, if you notice areas of bright highlights turning white and losing detail, that’s a clear sign your image is hitting the limits of what your camera can capture. This can leave parts of your shot looking washed out, which isn’t great for conveying the mood.
Another thing to keep an eye on is the shadows. When they’re too dark and lack detail, your footage can end up looking murky and flat. Imagine filming a beautiful forest scene, but the trees all blend into a dark blob—no fun, right? In the same vein, watch out for flat midtones. These can make your subjects appear less three-dimensional, almost like they’re stuck in a cartoon!
And let’s not forget about banding, which shows up as weird stripes in gradients, like the sky or skin tones. This can ruin an otherwise stunning shot. Plus, if your foreground and background look too similar in brightness, it can make the whole shot feel less interesting. Keeping your exposure balanced creates a more dynamic and engaging viewing experience.
Cameras with a dynamic range of 11 to 13 stops, such as those from Blackmagic Design, help maintain detail in both highlights and shadows, reducing these common issues.
The Role of Lighting in Dynamic Range Perception
Have you ever thought about how lighting impacts our perception of dynamic range in videos? It’s a fascinating topic, especially if you’re aiming to amp up your video quality. When we’re dealing with high-contrast scenes, we can easily lose important details in both the shadows and highlights if we don’t manage our lighting well.
Imagine shooting a sunset where the bright sky competes with the dark landscape below. Without the right lighting setup, you might end up with a washed-out sky or completely black shadows. To keep those details intact, consider using diffused light sources or reflectors. This way, you can soften harsh shadows and bring out more texture in the highlights.
Another handy tool is the neutral-density (ND) filter, which helps you tone down overwhelming light during the day. This maintains a balanced exposure, making it easier to capture everything from bright moments to deep shadows without sacrificing clarity. And if you’re feeling adventurous, try HDR techniques—like taking multiple exposures to layer together for a richer contrast.
In the end, a thoughtful lighting strategy not only ensures your histogram looks great but also showcases the full dynamic range of your scene. With these tips, you’ll be well-prepared for various lighting situations! Choosing a camera with advanced autofocus technology can further help maintain clear focus across different lighting conditions.
Recommended Products

SONY FX3 CAMERA INCLUDES: Sony FX3 Full-Frame Cinema Line Camera | Sony FE 24-70mm f/2.8 GM II Lens | Lexar Professional 128GB Memory Card | Battery Pack with USB-C Port | 82mm Digital Essentials Filter Kit | Multi-Device Shoulder Bag | Complete Optics Care and Cleaning Kit
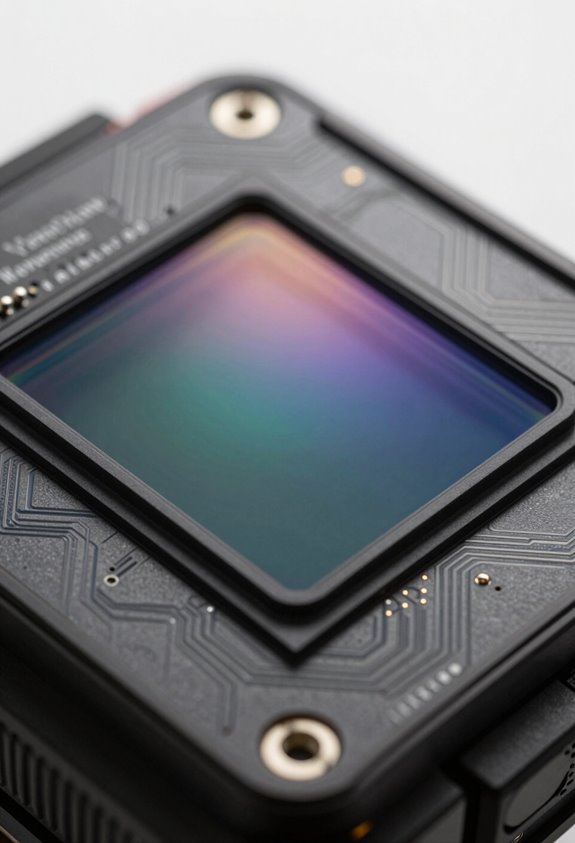
102MP Large Format Sensor for Unmatched Detail: The Fujifilm GFX100RF Digital Compact Camera features a 102MP GFX CMOS II Sensor large format sensor, delivering extraordinary image quality with rich detail, wide dynamic range, and low noise. Paired with the X-Processor 5, it ensures superi or sharpness and accurate autofocus. Whether capturing landscapes, portraits, or editorial work, the larger sensor size produces a depth and clarity unmatched by traditional full-frame cameras.

102MP Large Format Sensor for Unmatched Detail: The Fujifilm GFX100RF Digital Compact Camera features a 102MP GFX CMOS II Sensor large format sensor, delivering extraordinary image quality with rich detail, wide dynamic range, and low noise. Paired with the X-Processor 5, it ensures superi or sharpness and accurate autofocus. Whether capturing landscapes, portraits, or editorial work, the larger sensor size produces a depth and clarity unmatched by traditional full-frame cameras.
How to Enhance Dynamic Range in Video
Hey! So, you know how enhancing the dynamic range in video can really make your footage stand out, right? There are some really effective strategies we can try to pull that off. For starters, using cameras with dual gain architecture is a smart move. It works by having separate streams for analog-to-digital conversion, which helps reduce noise and gives you better sensitivity in different lighting conditions.
Another handy tip is shooting in raw formats. This way, you keep the full dynamic range, so you can play around with details in post-processing without losing quality. For instance, if you shoot a sunset scene, you’ll want to ensure the vibrant colors in the sky and the darker silhouettes of trees are both captured well.
Using neutral-density (ND) filters is also a game-changer. These filters control how much light gets in through your lens, allowing you to use wider apertures or longer exposures. This means you can bring out more detail in the shadowy areas while still keeping the bright spots looking good. Lastly, HDR techniques let you take multiple shots at different exposures and combine them, which helps you capture all those tricky highlights and shadows. When reviewing your footage, viewing it on a monitor with IPS panels can help you accurately assess the dynamic range details thanks to their wide viewing angles and color accuracy.
Recommended Products

【Global 5G Network】Cutting-edge 5G technology, supports dual SIM dual standby, bringing a more convenient, intelligent and efficient new life and work mode. (🧡Not compatible with AT&T or Cricket)

New 20.4 megapixel live MOS sensor

【Core Parameters】★AI Perf: 34/67 TOPS ★GPU:1024-core NVIDIA Ampere architecture GPU with 32 Tensor Cores ★CPU:6-core Arm Corte-A78AE v8.2 64-bit CPU 1.5MB L2 + 4MB L3 ★Memory:8GB 128-bit LPDDR5 68 GB/s ★Storage: external NVMe via M.2 Key M
Using Log vs. Standard Profiles to Maximize Dynamic Range
So, let’s chat about choosing between log and standard profiles to get the most out of your dynamic range in video projects. Basically, log profiles use a special curve that captures a wider range of light and shadow detail. Think of it like this: when you shoot in log, you’re more likely to catch those tricky highlight details—like clouds in a bright sky—without losing deep shadows. On the other hand, standard profiles can make your footage pop with sharper contrasts, but they might drop some of that detail in high-contrast scenes.
When you shoot in log, you’ll usually need to do some color grading in post-production, but that’s actually a good thing! It gives you the freedom to tweak exposure and colors to your liking. Plus, each camera has a different log profile, so it’s worth getting to know what yours offers. For example, some cameras might have a log profile that excels in outdoor settings while another handles artificial light better.
In the end, understanding how these profiles work helps you make the best choice for your footage. Whether you’re aiming for a dreamy sunset or a vibrant cityscape, knowing your options can make a huge difference. Now, let’s explore how to apply these techniques in different shooting scenarios. Using a professional makeup kit with mirror can enhance your on-set appearance when working with different lighting profiles, ensuring you look your best during shoots.
Recommended Products

SONY FX3 CAMERA INCLUDES: Sony FX3 Full-Frame Cinema Line Camera | Sony FE 24-70mm f/2.8 GM II Lens | Lexar Professional 128GB Memory Card

SONY FX3 CAMERA INCLUDES: Sony FX3 Full-Frame Cinema Line Camera | Sony FE 16-35mm f/2.8 GM Lens for Sony E

SONY USA AUTHORIZED - Includes Full SONY USA WARRANTY | Introducing the Sony Alpha a7S III - a new milestone in sensitivity, speed and image supremacy.
How to Evaluate Dynamic Range With Post-Processing?
Hey there! So, you’re curious about how to evaluate dynamic range during post-processing, huh? Well, the first thing you’ll want to do is take a look at your footage’s luminosity histogram. This little chart will help you spot if there are any highlights that are too bright (we call that clipping) or shadows that are too dark (that’s shadow loss) so you can ensure your exposure levels are just right.
Once you get into your editing software for color correction, you can really make a difference. For instance, if you have an overexposed sky or a dark foreground, you can tweak those areas to bring back some of the lost details. This gives you a better understanding of how your camera handles dynamic range. Just remember, when you’re adjusting exposure, keep an eye out for noise or banding in your footage. Overdoing it can expose your camera’s weaknesses in terms of signal-to-noise ratio.
Another cool trick is to compare standard picture profiles with log profiles. Log footage usually captures more dynamic range, but it also needs some careful grading to look polished. For example, you might find that shooting a sunset in log preserves more detail in the bright colors than a standard profile would. Plus, trying out your footage in different lighting conditions will help you really gauge how well your camera performs. Now, with these tips in mind, let’s chat about color grading techniques that can elevate your footage even further!
Also, using camcorders with CMOS image sensors can significantly improve clarity and dynamic range in your recordings.
Common Mistakes in Assessing Video Dynamic Range
When it comes to assessing video dynamic range, things can get a bit tricky. A common mistake people make is taking a manufacturer’s claims at face value. Just because a camera boasts a high dynamic range doesn’t necessarily mean it performs well in real life. For example, you might see a camera advertised with 15 stops, but if you look at test results, it could fall short in actual performance.
Another factor to keep in mind is noise. When you’re filming, especially in low light, noise can create a grainy look that hides details in the shadows and highlights. This distortion can make a camera appear better than it really is. If you’ve ever shot a scene at dusk and noticed the noise spoiling the clarity of your footage, you know exactly what I mean.
Don’t forget about compression, either. If you’re working with a high-compression codec, it can squash fine details and significantly reduce your video quality. Take, for example, the difference between shooting in a high-quality format like ProRes versus a heavily compressed format like H.264. The latter may look decent on some screens but can really struggle when you try to enhance the footage in post-production.
It’s easy to get caught up in the technical specs like the number of stops a camera has, but those stats don’t tell the whole story. Real-world factors like highlight recovery and noise reduction techniques play a crucial role in how well a camera handles dynamic range. And understanding the difference between linear and logarithmic gamma formats can really help you grasp how your footage will manage all this range. It’ll make a difference in how you approach your next video project!
Additionally, using camcorders with advanced image stabilization technology can help maintain clarity and detail when shooting dynamic scenes, which influences the perceived dynamic range in your footage.
Frequently Asked Questions
What Is the Dynamic Range of a Video?
When we measure dynamic range, we disclose a video’s potential canvas, revealing contrast ratios that breathe life into visuals. Its importance lies in color depth significance; true artistry thrives in capturing every highlight and shadow’s story.
How to Determine Dynamic Range?
To determine dynamic range, we’ll assess visual contrast, evaluate exposure latitude, and analyze color depth in our footage. By using techniques like histograms, we can better understand how well our camera captures detail across bright and dark areas.
How to Test the Dynamic Range of a Camera?
To test dynamic range, we’ll have to capture multiple exposures of the same scene. By checking highlight retention and shadow detail in each shot, we can assess our camera’s performance effectively through dynamic range testing.
What Settings Do I Need on My Camera for Footage to Be Real Crisp?
For crisp footage, we need to use low ISO settings, a log picture profile, moderate aperture, and an ND filter. Also, monitoring ideal exposure and adjusting for lighting conditions is essential for achieving great results.


